

Spiral Key Fob using a Spiral Portuguese Sennit
After I wrote the original article on Lanyards & Key Fobs, some friends saw the spiral version and wanted to know how to make the spiral key fobs.
Making a Spiral Portuguese Sennit, key fob is not too difficult and the spiral gives a new texture and color pattern.
Either the original flat Lanyards and Key Fobs or the Spiral versions are easy to make with a bit of practice. These make great little gifts for people, make them in their college or favorite colors.
If you have friends with sailboats with Pelican Hooks on their lifelines, make them a set Red & Green Lanyards for their Pelican Hooks, if you are in a bit of a joker mood, install them with the colors reversed.
I have given many Key Fobs & Pelican Hook Lanyards to friends and others as gifts, since everyone seems to like different colors, I made a large assortment of many different colors and line types then let people choose their favorite color.
This knot goes by many names, Portuguese Sennit, Cobra Knot, Solomon’s Bar, Boatswains Plait and probably some others.
The difference in texture makes finding the key fob by touch easy when reaching into a pocket or purse. Friends have used these for car keys and ID badges at work.

Finished Pelican Hook Lanyards / Shackle Lanyards and Key Fobs showing some of the different colors of cord that can be used
Types of twine to use? Most any small cord or twine will work. For more information on the cord I use for these type of projects and where to buy the cord, please see my earlier article: Making Pelican Hook Lanyards & Key Fobs.
I melted the green and yellow twine together to make it easier to see how the cord is routed. I have not used two cords stuck together for real projects.
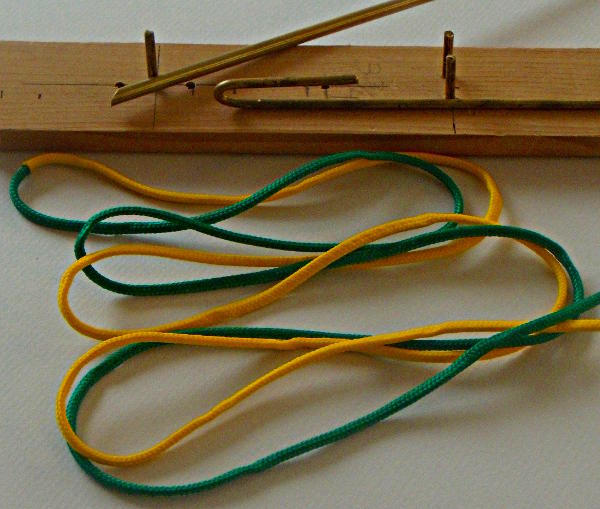
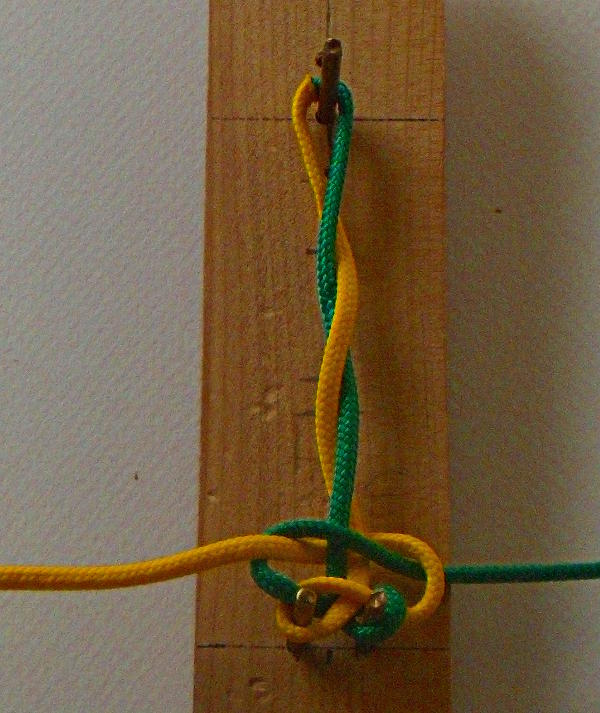
Basic tools for making a Spiral Portuguese Sennit key fob
Step 1 are the tools. A piece of scrap wood with pins spaced 3 3/4 inches apart and two pin 1/2 inch apart. I have holes at different distances for different sized key fobs and lanyards.
The pins are 1/8 inch diameter brass welding rod that I had laying around at home. Round all sharp corners to prevent injuring yourself, plain nails can also be use.
The pins are used to start the Spiral Portuguese Sennit key fobs. These can be made without the pins, but the pins make things much much easier and and the Spiral Portuguese Sennit key fobs are all the same size.
The brass tube has a bevel on it and is used at the end to thread the bitter end down the center of the Spiral Portuguese Sennit key fob.
The hook is a short piece of brass welding rod I had laying around, it is used to hold one end of the Spiral Portuguese Sennit key fobs while tying the knots. A short piece of cord tied to a solid object like a chair back can also be used.
The line is two pieces of # 48 Powers, Rounded MFP Braided Line that I fused together to make the example easier to see.
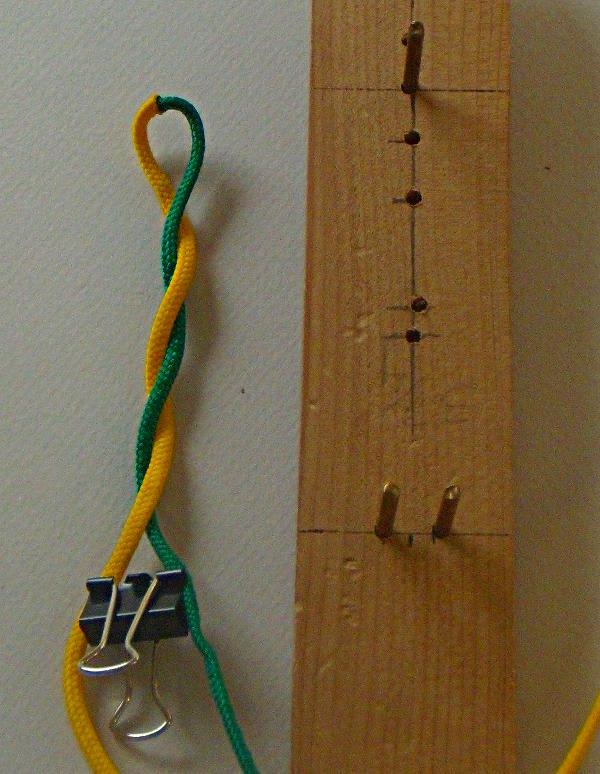
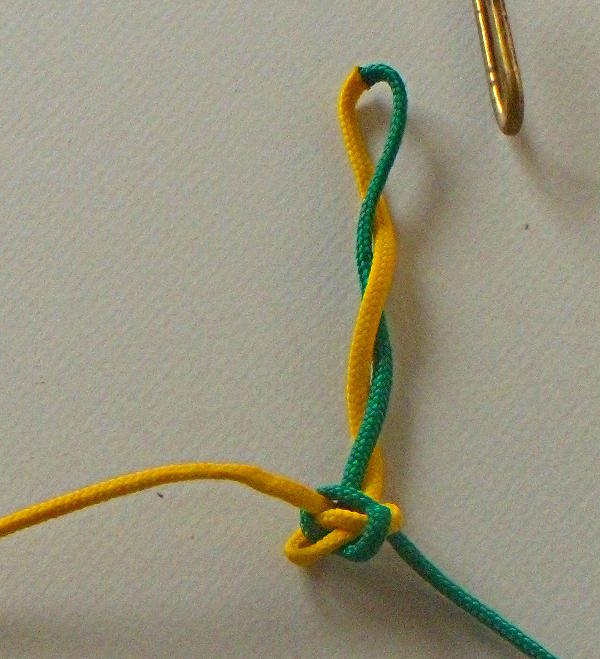
Twist the cord clockwise like making a rope to provide a spiral base for the Spiral Portuguese Sennit, key fob
Step 2: Twist each line clockwise about 1 1/2 turns, this is sort of like making a two strand piece of rope. The spiral is needed in the center core to keep the loop at the end from being twisted by the Spiral Portuguese Sennit as it spirals around the center cord.
The number of turns varies by the size of the cord, smaller cord will spiral faster so more turns are required, larger cord spirals slower so fewer turns are needed.
If the center cord spiral is not exact the loop at the end will have a bit of a twist in it, but unless the center twist is way off things should work OK. Remember that until the extra cord is cut, the Spiral Portuguese Sennit can be undone and started over.

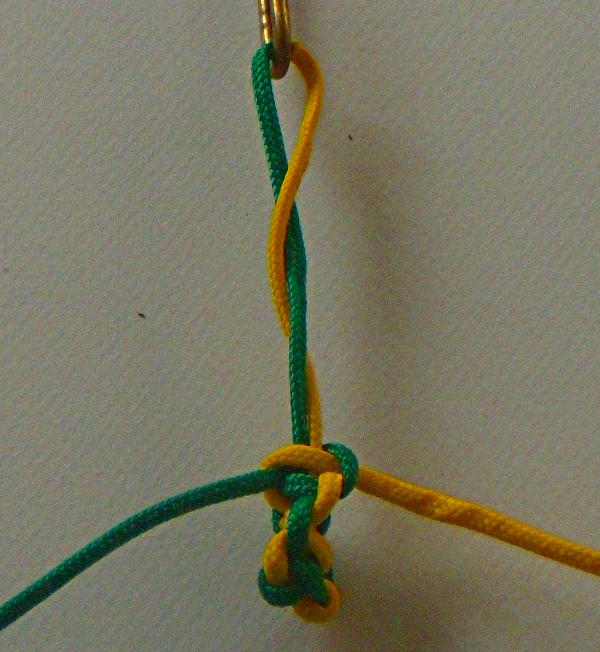
Place the twisted cord over the pins
Step 3: Place the twisted cord over the pins.
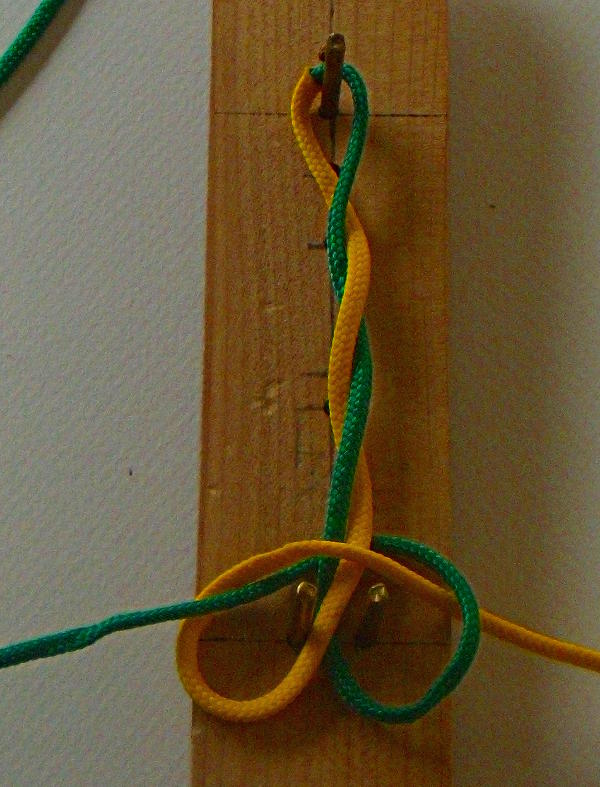
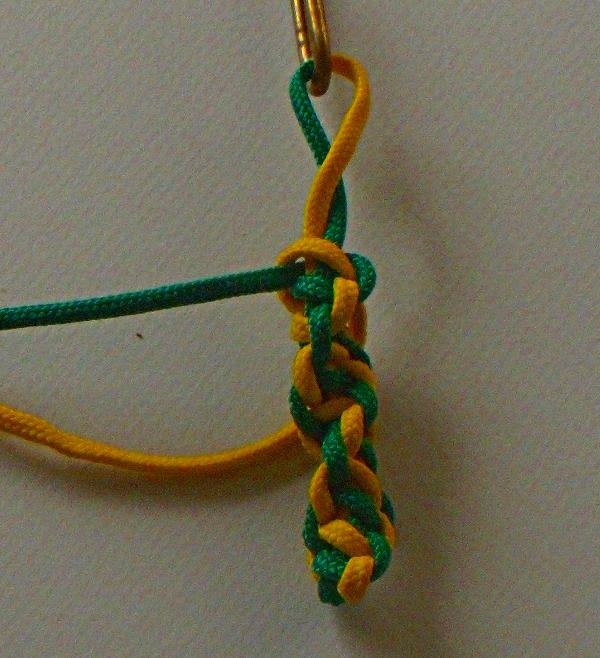
Starting the Spiral Portuguese Sennit, key fob
Step 4: Starting the first knot. The spiral is going to the right so the right side cord (green in this example) needs to go under the center cord.
The right hand cord will always go on the bottom side to keep the spiral going in the same direction.
Snug down the knots around the pins
Step 5: Snug up the knots around the bottom pins.
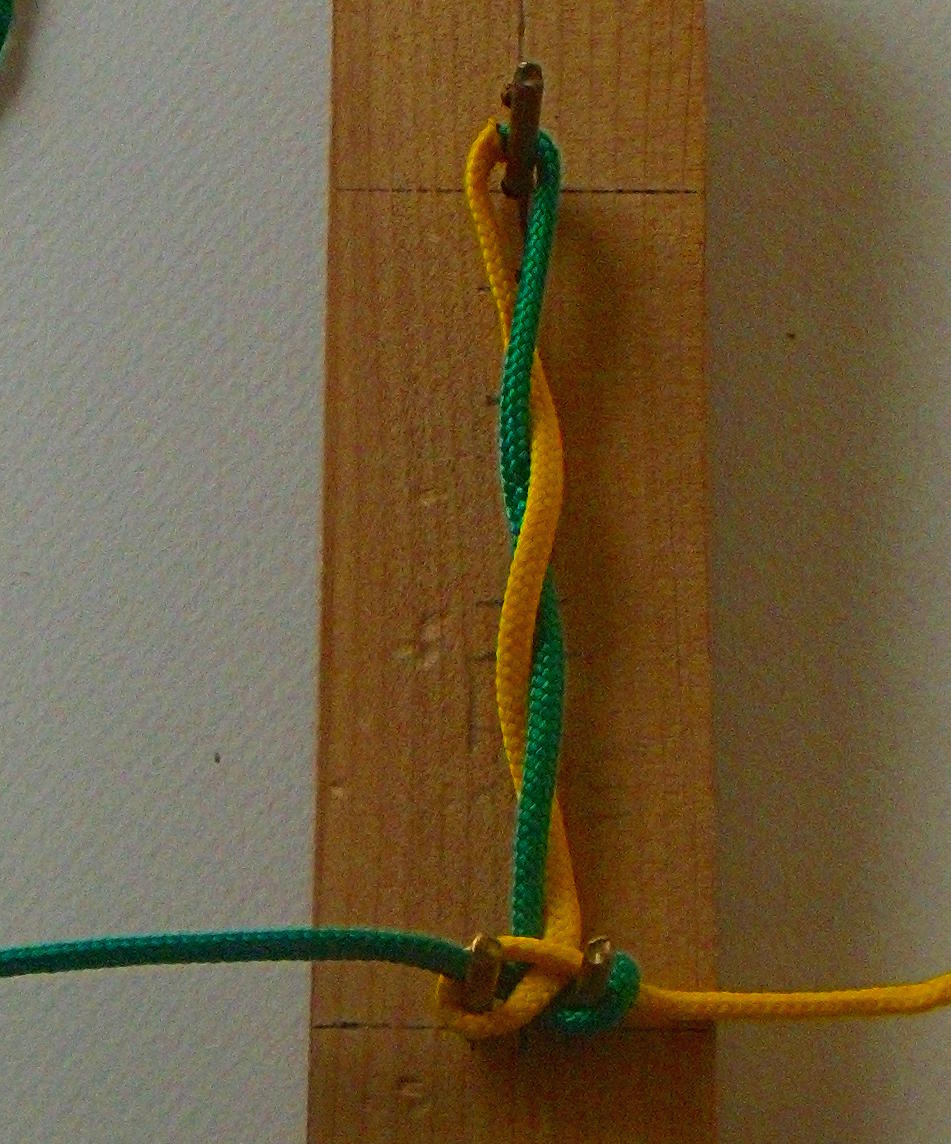
Take the cord that was on top and route it under the center cords to give the spiral
Step 6: The second knot, again the right hand cord (yellow now) goes on the bottom.
With this two color example the colors will alternate going on the bottom.
Tighten the knots up snug but not drum tight.
Take the Spiral Portuguese Sennit, key fob off the pins and pull the slack out of the cord where the pins were
Step 7: Take the Spiral Portuguese Sennit key fob off the starting pins.
Pull the slack out of the Spiral Portuguese Sennit key fob where the starting pins were.
Continue around the spiral, putting the cord that was on top on the bottom or underneath – remember to always spiral in the same direction
Step 8: Hook the Spiral Portuguese Sennit key fob on the hook (or use a short piece of cord tied or fastened to something solid.
Continue tying more knots around the center core, being careful to always pass the right side cord under the center cords.
The knots should be tied evenly, the spiral twisted Sennit is more difficult than a flat Sennit and it will take some practice to have the knots tied evenly and to get a nice spiral.

Sometimes it is necessary to take the Spiral Portuguese Sennit, key fob off the hook to make sure the spiral is not strained
Step 9: The Spiral Portuguese Sennit key fob can be difficult to keep straight and even.
Sometimes taking it off the hook to straighten it out can help.
Flexing and bending the spiral can also help to keep the spiral even and straight.
Stop about 4 knots short of the total length of the spiral desired
Step 10: This is Four knots short of where the end of the spiral will be.
Tie the last 4 knots loose, this is to allow the bitter ends to be threaded down through the center of the knots
Step 11: Tie the last four knots loose, this is to make it easier to pass the bitter end of the cord down the center of the spiral to give a nice finished end.
Make sure the first loose knot is loose enough to be able to grab the loops and pull the slack out of the knots.
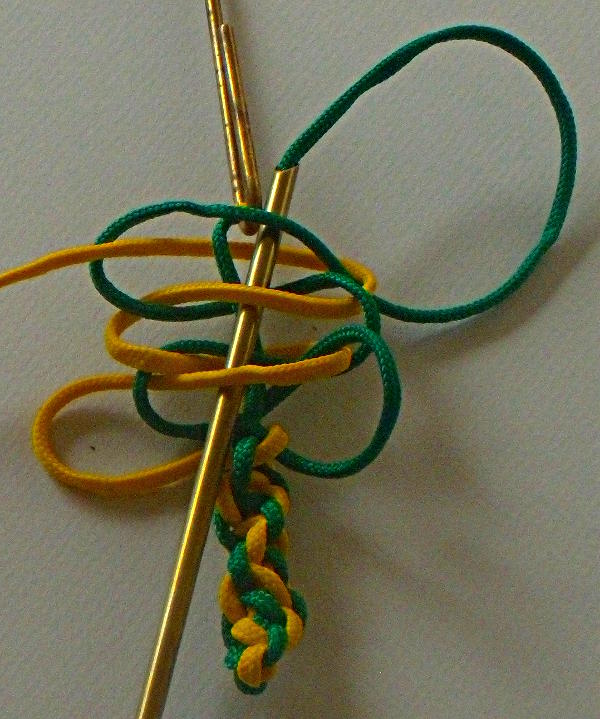
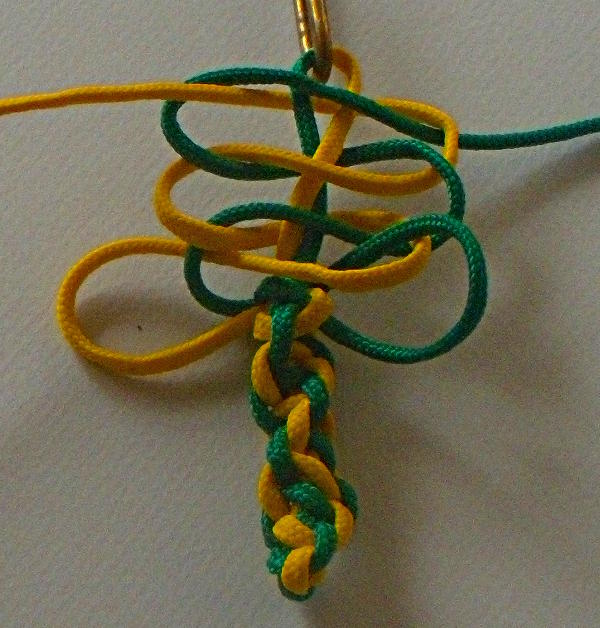
Thread the bitter end down through the center of the knots
Step 12: Loop the bitter end around the last knot and feed it down through the center of the spiral.
I use a brass tube to make threading easier, but it can be done without the tube.
Yes there should be 4 cords on top of the brass tube, I went over the first green cord and not under it. So double check your work.
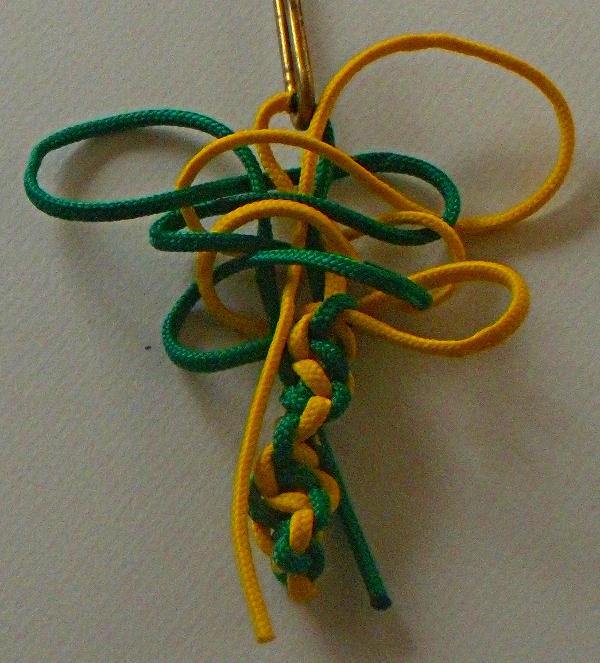
The flip side
Step 13: The flip side, note that I did get the bitter end under all 4 knots this time.

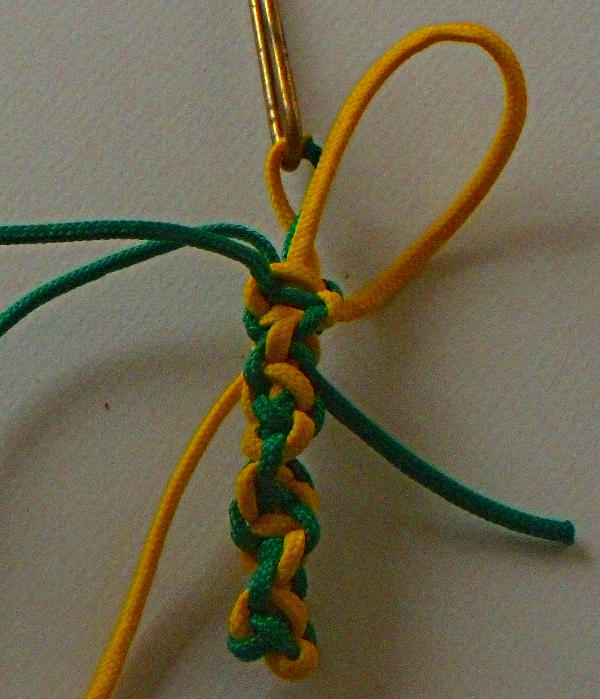
Starting to tighten up the knots to hold the bitter end in place
Step 14: Starting to pull the slack out of the knots to trap the bitter end in the center of the spiral.
Pull these down snug.
Again be extra careful to have the knots even and the bitter end neatly tucked in the center of the spiral.
Pulling the slack out of the bitter end to give a nice finish to the knot
Step 15: The slack has been removed from the last four knots.
I like to snug down the last two knots at the end of the spiral extra hard to trap the bitter end securely.
The slack has also been partially pulled out of the first bitter end line (yellow).
Pull the slack snugly out of the loop.
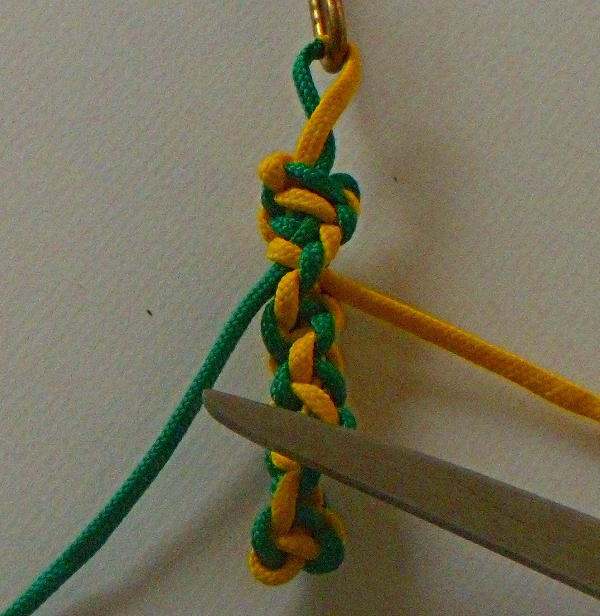
Ready to trim the extra cord flush with the knots
Step 16: The slack has been pulled down snug and the bitter ends are ready to be trimmed.
Cut the excess cord flush with the outside of the spiral.
Be very careful with the scissors, it is easy to cut the spiral as it is difficult to get the scissors down into the bottom of the spiral.
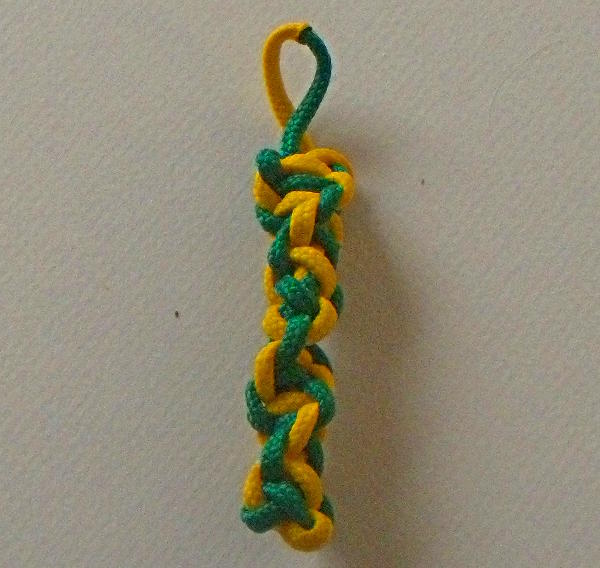
Finished Spiral Portuguese Sennit, key fob – note the alternating cross bar colors showing how the spiral works
Step 17: Finished Spiral Portuguese Sennit key fob.
The upper loop has a bit of a twist in it because the spiral wound into the center section did not exactly match the outside spiral.
The spiral does not show up very well in this view and it looks a bit jumbled up.
But skip to the next picture.

Different colored versions of the Spiral Portuguese Sennit, key fob
Step 18: Three different Spiral Portuguese Sennit key fobs showing a better view of the spiral using different style cords.


Different colors and types of cord, let your imagination run wild!

Pelican Hook for a Lifeline
You might also find this useful: Simple tips to take the mystery out of the Pelican Hook.
Thanks for your interest in and support of boating safety.
c/m


Pingback: DIY Gifts for the Holidays | Boating Safety Tips, Tricks & Thoughts from Captnmike