

Failed lower Boom Vang Mount and mounting bolts
Last fall we were sailing along nicely on a medium wind day when we heard a loud bang, the bang got our attention but looking around we were not able to see anything wrong, shrouds and stays were fine and the rest of the rig also looked OK.
A few minutes later as we were still trying to figure out the first bang a second loud bang happened and the boom jumped up and we could see the Boom Vang hanging loose, mystery solved!
With no Boom Vang the trip back home was cautious, I probably could have rigged a temporary lower mount but the wind was not too bad and we were not far from home so we did not rig a temporary mount.

Materials for the lower Boom Vang Mount repairs
Supplies for the repair, 3/8 inch drill motor, T Handle Tap Wrench, small hammer, small pin punch, HeliCoil Thread Repair Kit (HeliCoil is the trademark and one of the early if not the first with a thread repair kit, others now sell similar repair kits, I have chosen to stick with the original) (the kits come with a drill bit, special tap, coil inserts and an insertion tool), Thread cutting lubricant and Silicone Paste to help cut down on corrosion between the threaded insert, mast and fastener, see also the “Secret Sauce“, Teff-Gel is very popular for preventing corrosion as are several other items, remember do not assemble the fasteners without some sort of protection or corrosion can occur and things can fail prematurely.
Tapping the holes for the HeliCoil Inserts to repair the lower Boom Vang Mount
Drill out the old holes with the proper size drill bit that comes with the tread repair kit.
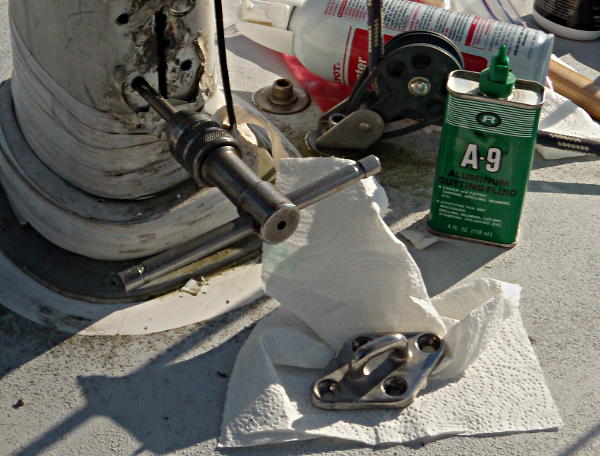
Tapping the new threads after the hole was drilled the HeliCoil kit. Note: The tap that comes with the HeliCoil Repair Kit is a special tap, the number of threads per inch need to match to a smaller size fastener so make sure you do not misplace the tap that comes with the kit, I doubt you will be able to find a replacement at your local hardware store.
Also remember to use thread cutting lubricant appropriate to the material you are tapping into, in my case the A-9 Cutting Fluid was designed for cutting Aluminum since I have an Aluminum mast..
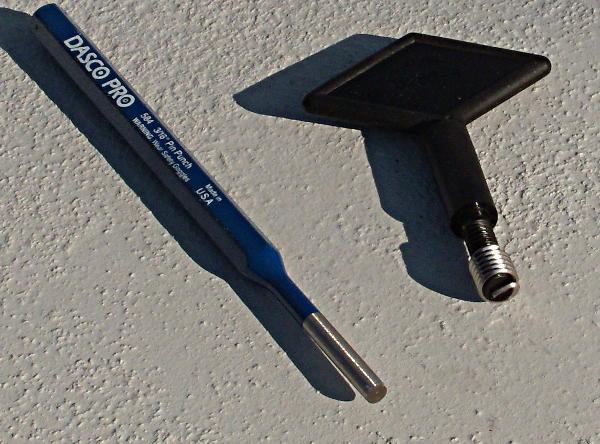
HeliCoil for the Boom Vang Repair showing the tab/tang used to help insert the HeliCoil into the threaded hole. The tab/tang needs to be broken off with a small pin punch once the HeliCoil has been inserted in the repaired hole
A closeup of the HeliCoil insert on the insertion tool showing the tang or tab that is used to thread the insert into the tapped hole.
The tang or tab is broken off after the threaded insert is in the proper location.
Be careful you have the insert in the correct location before the tab is broken off, and remember to protect the threads from corrosion with a good anti-corrosion paste or gel.
Finished repair with the lower mount of the Boom Vang fastened in place
The finished repair back like it was before the bang.
But after thinking about the repair for a short time I did not like it, I figured the same stresses that caused the first failure might come back in the future.
See the next step below for what I think is a better and safer final solution.

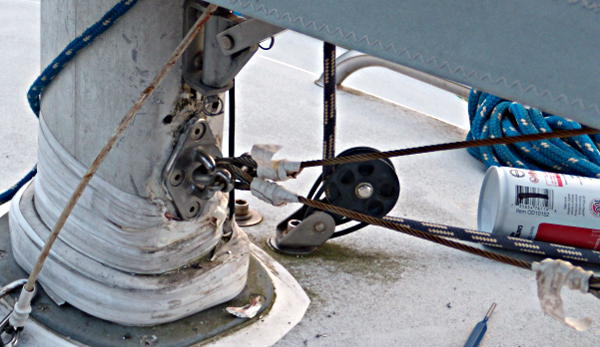
Revised Boom Vang repair showing the lines going around the mast
This shows the final repair, sorry for the bit confusing picture.
I decided to use some AmSteel line from Samson Rope (12 strand single braid non-rotational line out of Dyneema, similar in strength to St. Steel but lighter and no rough edges) and put a round turn around the mast so the lower fitting was mostly loaded in shear with very little tension on the fasteners. With the AmSteel going around the mast the bottom fitting is used to keep the AmSteel from slipping up and getting out of position. I did this for both the lower Boom Vang line and the Cunningham lower mount. There was just enough space in the lower mount for the six strands of AmSteel to be threaded though the lower fitting.
I spliced the AmSteel using a Brummel Splice, I spliced one end and then threaded the line through the fittings and used a McDonald Brummel Splice as explained by Brian Toss in several of his books, the McDonald Brummel only requires access to one end of a line to make the splice where a standard Brummel Splice requires access to both ends of the line.
Thanks for you interest in and support of Boating Safety
– c / m –

