

New Soundproofing / Noise Insulation Materials, bat with adhesive, Mylar Tape and mechanical fasteners.
Last spring I needed to replace and upgrade the Sound Insulation / Sound Proofing on my boat after upgrading and installing a new engine in the boat.
The engine compartment and panels had to be modified with the port side of the engine compartment needing to be moved out 1.5 inches and a new front panel made and Sound Insulation / Sound Proofing added to the new panels.
When installing sound insulation materials details count! A small hole or gap in the insulation can reduce the effectiveness of the insulation. Also sound can be transmitted through the structure of the vessel. Make sure that any joints between bats are properly taped, this prevents vapors from getting into the bat and causing deterioration of the batting material, deterioration of the adhesive or reduction of the effectiveness of the sound insulation.
Be extra careful not to leave gaps in the Soundproofing / Sound Insulation, bats on removable panels, a bit of compression where the bats meet is desired to keep sound from leaking out through an air gap.
I picked the Sound Insulation / Soundproofing batting that had a high strength adhesive already applied to one surface, since I did not want to mess around with applying adhesive and the mess that I thought it would entail, and the cost difference was not much at all.
If the surfaces are porous (such as wood) the surfaces should be properly sealed to improve the adhesion of the Sound Insulation / Sound Proofing. Having the bats come loose is not a pleasant experience. If the surface is existing paint or fiberglass clean the surface well to remove any dirt, loose material or oil that might prevent the adhesive from sticking firmly to the surface.
I had some old Some of the Soundproofing / Noise Insulation to replace also. I removed the old bats and scraped much of the old deteriorated foam off as I could with a flat scraper. The old adhesive and foam was then cleaned off with 3M Adhesive Remover to remove the last traces of the old foam and adhesive. Be sure to protect your hands and use lots of clean rags.
I used Soundproofing / Noise Insulation manufactured by Soundtec (North American Distributor General Insulation Company) from Fisheries Supply in Seattle, Washington.
New Soundproofing / Noise Insulation Materials, bat with adhesive, Mylar Tape and mechanical fasteners.
The basic Sound Insulating materials, a bat of sound insulating material, Mylar Tape with extra sticky adhesive and a steel fastener plate with a 2 inch pin, a steel speed washer and an aluminum domed cap (the cap is to prevent the end of the pin from injuring someone or causing the pin to catch someones clothing.
The sound insulating bat came with high strength adhesive already applied (see the blue protective sheet.
Also needed are heavy duty scissors or shears, marking pen, tape measure, straight edge. Sheets of poster board or some heavy craft paper is also nice, make a pattern for the sound insulating bat. Making a pattern is easier than just marking on the bat and cutting, less errors are also made with the pattern method.
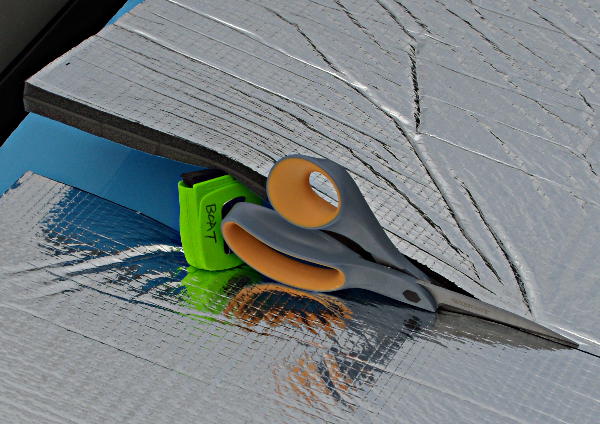
Cutting the New Soundproofing / Noise Insulation Materials, with heavy shears
The sound insulation can be cut with heavy scissors or shears.
The sound insulation material is a bit stiff so it takes a bit of doing to cut the roughly one inch thick bat of insulation in this example that has several layers.
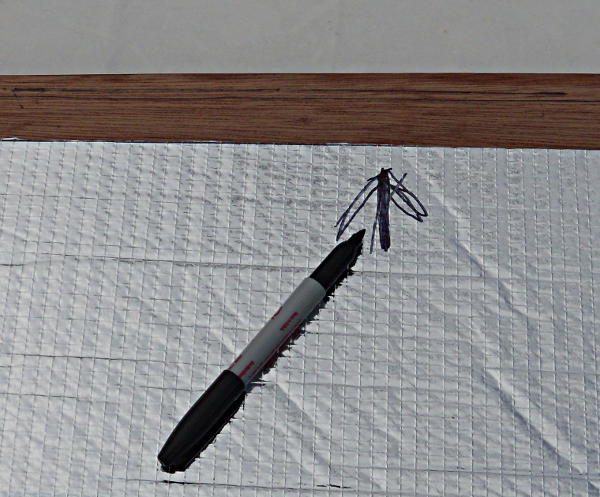
Remember to mark the Soundproofing / Noise Insulation Material bats so they will not get mixed up.
Mark the insulation in some manner before cutting the sheets so the insulation will be installed in the correct position.
Also make marks or put pieces of tape on the material the insulation is fastening to to help with proper placement of the insulation bats.
You want to dry fit the sound insulating bats to make sure everything fits correctly.
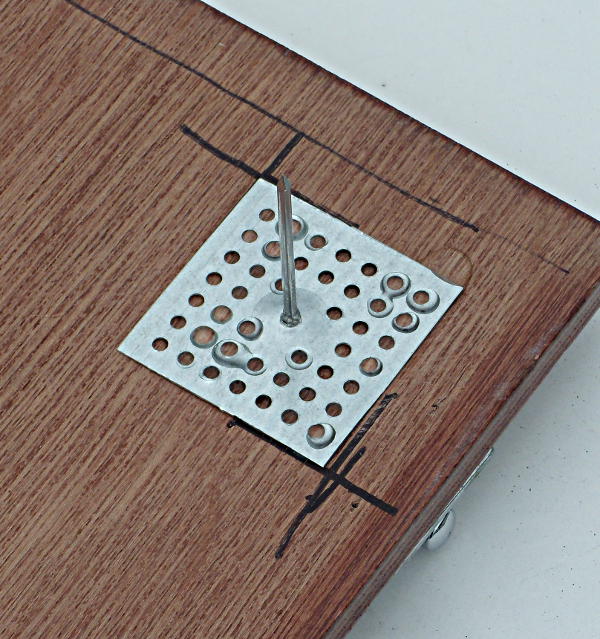 Attach the steel fastener plate to the panel, use nails, screws epoxy etc. I used epoxy.
Remember to seal or finish the surface of the panel first, that will help the adhesive for the sound insulation bats stick better.
The steel plate, pin and washer are to hold the bat in place should the adhesive holding the bats in place fail.
Soundtec (the manufacture of the sound insulation I used) recommends the bats be mechanically fastened every 15 inches starting at the center of the bat in case the adhesive fails or the bats deteriorate. If a bat comes loose it can fall down onto the engine or rotating equipment that could cause serious damage.
The surface the Sound Proofing / Sound Insulation bats is applied to should be clean and dry with no oil or other contaminates that would prevent the adhesive from sticking to the mounting surface.
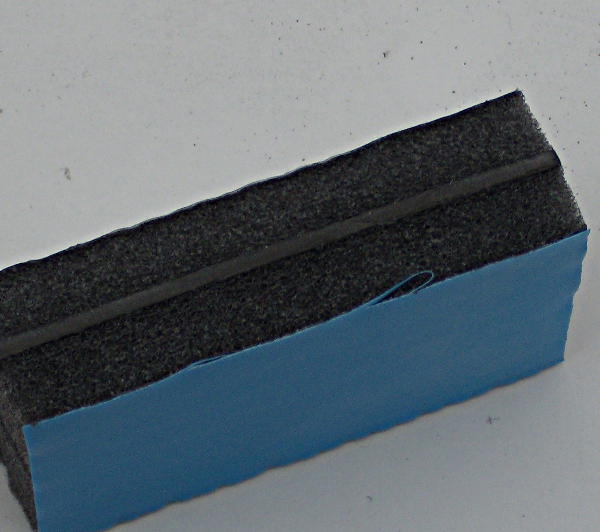 A cross section of the insulation batting.
This batting uses two layers of foam with a very dense layer of mass loaded vinyl sandwiched in the center between two layers of polyether fire retardant open cell foam.
The far side is a silver Mylar vapor barrier that is also easy to clean. The barrier keeps vapors such as fuel and lube oil from getting into the foam.
Lead used to be used as the center layer but it has now been replaced with very dense vinyl materials in this bat.
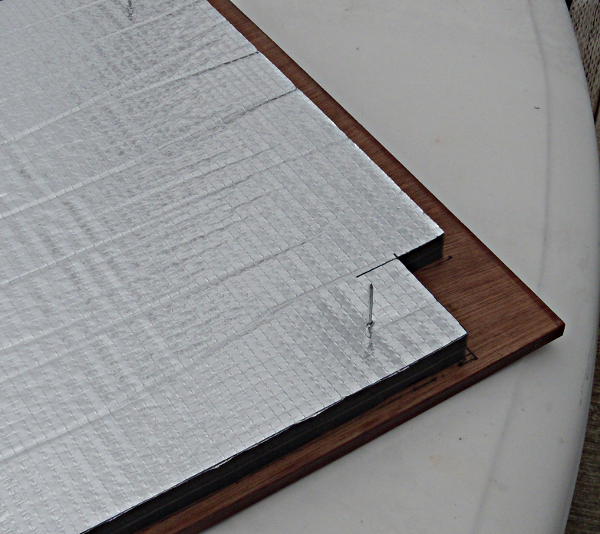
 The insulation bat has been dry fitted and pressed down on the pins to keep the bat in the proper position.
The blue adhesive covering has been partially removed at this point.
The adhesive is very aggressive so make sure the bat is in the proper position before the adhesive is allowed to touch the panel the batting is being attached to.
 The insulation bat is sitting down on the panel. Press the bat down firmly to make sure the adhesive adheres to the panel well. Pressing down firmly is a very important operation, going over the entire bat and press down firmly a couple of times is a good idea.
Pressing firmly with your hands and moving the hands only an inch or two between presses is a good idea.
The bat is ready to apply the Mylar Tape to the edge of the bat to seal the edge of the bat to keep fumes and moisture out of the batting.
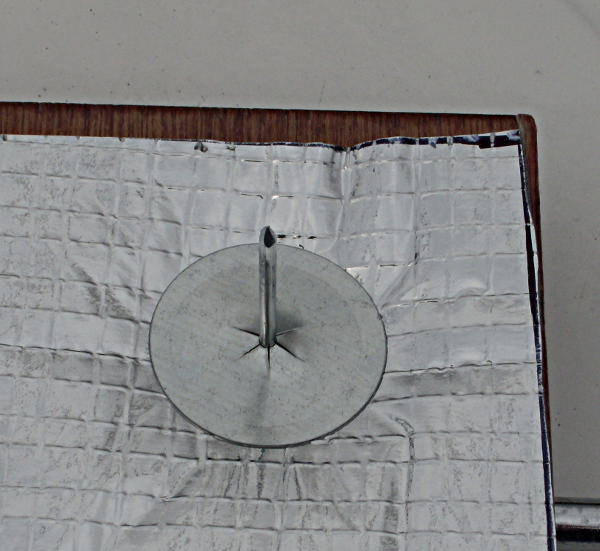 The speed washer has been pressed down to compress the bat a bit.
I made an error here and put the washer on ahead of the Mylar Tape and had the tape on top of some of the washers with the tape not sticking completely to the batting in a couple of places.
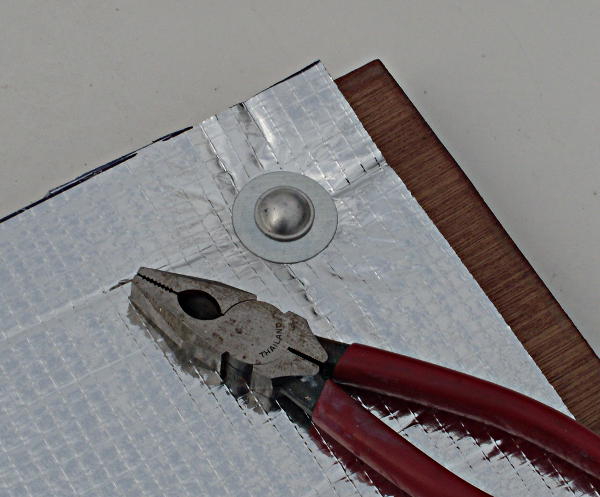
The pin has been trimmed down to 1/8 inch above the speed washer and the aluminum domed cap has been placed over the end of the pin.
The domed cap protects people from getting injured by the raw end of the pin.
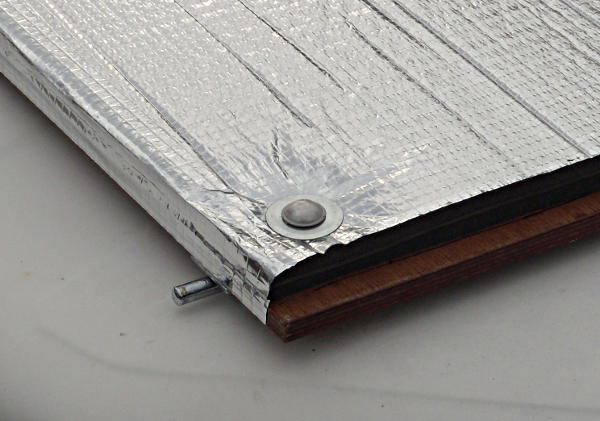 Edge view showing the Mylar Tape on one edge with the washer and domed cap in place.
Remember to put the Mylar Tape ahead of the washer and domed cap.
Thanks for your interest in and support of boating safety
– c / m –

