

Improved Fender Whip for fenders with an eye
This improved Fender Whip is easier to handle and holds knots much better than a regular three strand or double braid fender whip.
Standard fender whips made of three strand or double braid are stiffer and over time become even stiffer as they age, and can be difficult to tie well around small objects.
Stripping the core from double braid makes the line easier to handle and it holds knots much better.
The fender whip in the example is tied with a Slippery Spar Hitch, it is the only knot I have found that will hold when a 1/2 inch line is tied around a 1/4 diameter polished chrome rod.
I have converted all my fender whips to this style with the stripped core and this has made tying the fenders on much easier and more reliable. Several friends have had me help them make new fender whips when they found out how well these work.
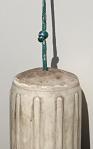
Fender Whip for fenders with a hole in the center
If you have fenders with a hole through the center, please see Improved Fender Whip – Part 1 for the how to make a fender whip for those fenders.
What is proper length for a fender whip? I like the whips to be a bit long. On my boat all the fender whips will allow the fenders to drag in the water when the fenders are tied to the handrails on the cabin top. Double Braid line comes in many colors, so different colors can be used for different length whips if desired.
A special thanks to the Coast Guard Chief that explained to me why they stripped the core from their fender whips (the fender whips are easier to handle and the knots hold much better). The fender whips I have seen at the Coast Guard base are a plain bury the tail (no Brummel Splice) then sew the tail with a very heavy sewing machine to form the eye.
CAUTION: I showed a friend how to make these fender whips for his boat. He went out and got new line to make new fender whips for his fenders. The new fender whips looked GREAT!! but the fenders now looked really junky, he bought new fenders and more new line for more fender whips. So you have been warned.

Supplies for the improved fender whip
Tools used, scissors, double braided line for the fender whip, utility knife, Brian Toss Splicing Wand, Sailmakers needle & Whipping Twine, Palm, masking tape, Point Hudson Fid, awl and fender.

Improved Fender Whip – Step 1 – strip core
Step 1 is to strip the core from the double braid line for the fender whip.
Taper both ends of the whip with some tape. The taper is needed because the line is threaded through through itself to make a Brummel Splice.

Improved Fender Whip Step 2 – start the Brummel Splice
Size the eye for the fender, a tail will be needed to bury into the whip. Two tucks will be needed for this version of the Brummel Splice (high load Brummel Splices might use 4 or 6 tucks, if the tail is not buried (used for Jib, Genoa or Spinnaker sheets, then a minimum of 3 tucks are needed).
Make sure an adequate amount of bury is allowed for. For smaller line like the 3/8 inch here I use about 6 to 7 inches of bury, larger line uses a bit more bury length, about 8 inches for 1/2 inch line.
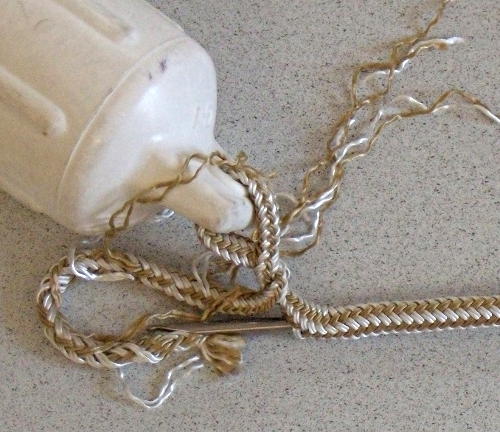
Start the Brummel Splice by threading the short tail through the longer part of the whip. A Port Hudson Fid is shown helping the line to pass through the longer standing end.

Improved Fender Whip – Step 3 – Brummel Splice 2nd tuck
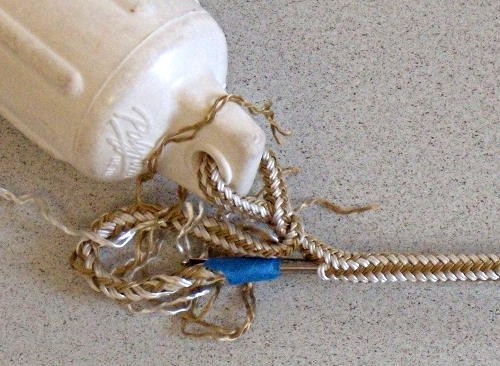
The second tuck for the Brummel Splice, The long section of the whip is fed through the short tail.
Improved Fender Whip – Step 4, tapered bury ready
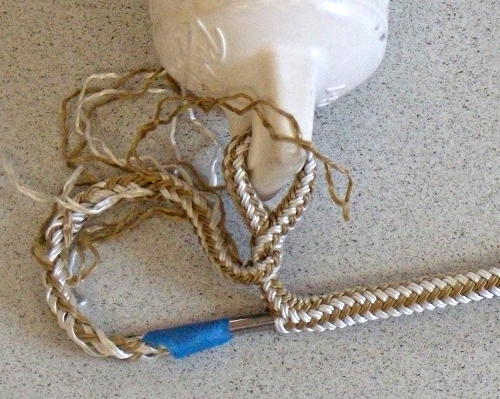
Snug up the Brummel Splice. Pull one yarn back to just before the bury will start, this is to hold down the buried tail so it will not come apart. If you don’t want to use a yarn to hold the tail down, whipping can be used instead, see below for the link to Quick Rope Whipping.
Please see Step 8 for a better view of the single strand.
Taper the tail a bit by removing 1/3 to 1/2 of the strands. Pull the strands out, but do not cut them off yet. If the strands are cut off now the tail will be more difficult to work with.
There are several methods to bury the tail, The Splicing Wand was used here, but several different tools can be used. If you don’t have a splicing tool a long piece of wire with a loop in it to grab the end of the tail. Some people have also reported using part of an old style ball point pen.
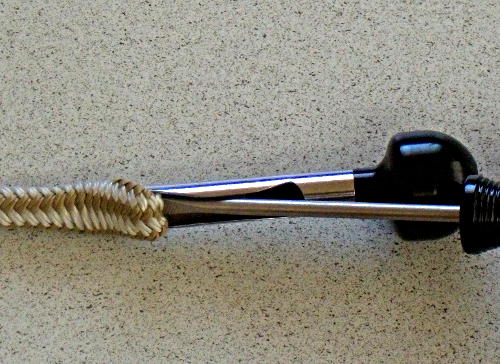
Improved Fender Whip – Step 5 – starting bury
Starting the bury.
I use a bit of masking tape to taper the tail a bit and snug the tail after being grabbed by the snare on The Splicing Wand. Brian Toss does not use the masking tape, but I have had trouble with the tail hanging up when I bury the tail.
Improved Fender Whip – Step 6 – different view of the bury
A better view just before the tail is buried showing the yarns for the taper not yet cut.

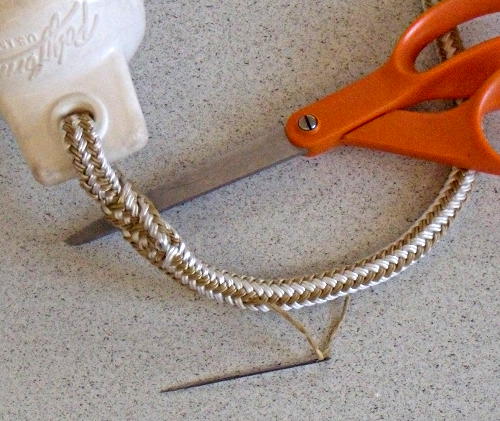
Improved Fender Whip – Step 7 – yarns being clipped to taper the bury
The tail partially buried and the yarns are being clipped off just before they are pulled inside the fender whip.

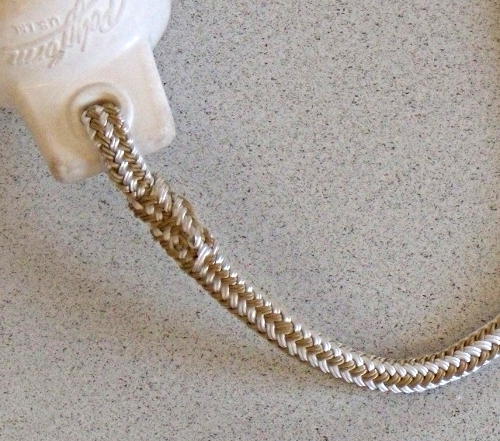
Improved Fender Whip – Step 8 – splice is buried
The bury completed and ready to unhook the wand and milk the cover down to bury the tail.
Note the single yarn sticking out to the left, that will be used to hold down the tail where it starts the bury. The yarn should be on the outside.
If you do not want to stitch down the tail with a yarn (or you forgot the yarn or buried it), my Quick Rope Whipping can be used to hold down the tail where it starts the bury.

Improved Fender Whip – Step 9 – ready to stitch down the splice
Coat the yarn well with Bee’s wax then thread the yarn onto a Sailmakers needle.
Use extra caution when putting on the Bee’s wax, the yarn tends to pull out of the braid and making the very uneven.

Improved Fender Whip – Step 10 – stitching down the splice
Starting the stitching to hold down where the tail starts the bury. Don’t pull the first 3 or 4 stitched down very tight or the area will be distorted.
Once the first stitches are done, pull the rest of the stitches down snug.
Stitch back and forth from one side of the splice to the other, each stitch should go back to the other side offset just a bit (on yarn width or 1/16 inch), put the stitches in a bit of a random pattern over the full width of the tail area just before the bury happens. The tail needs to be held down so it will not loosen up and come apart.
Improved Fender Whip – Step 11 – stitching buried in center of the whip
Stitch until the yarn is almost all used up, then bury the last of the yarn for one to two inches in the center of the fender whip.
Clip off the extra yarn and milk it back into the fender whip.
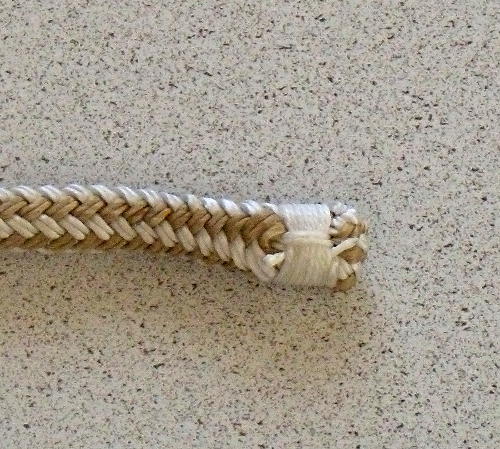
Improved Fender Whip – Step 12 – Finished
Fender whip attached to the fender with completed Brummel Splice.
Improved Fender Whip – Step 13 – finishing the bitter end
Tucking the end of the whip back inside itself gives a nice finish, and the slight lump lets you feel when the end of the whip is reached, helps to prevent dropping the fender.
A Point Hudson Fid and a small screwdriver can be used to tuck at least 1/2 inch of the whip inside itself. The end bury can be more than 1/2 inch.
A slicing wand can also be used to bury the end.

Improved Fender Whip – Step 14 – end stuffed into the bitter end.
The bitter end tucked back inside itself, a nice smooth end that is easy on the fingers and a larger section that lets the end of the line be felt without looking.
Improved Fender Whip – Step 14 – whipping on the bitter end
The bitter end finished with my Quick Rope Whipping.
Thanks for your interest in and support of boating safety.
c/m


Pingback: DIY & Low Cost Gifts For Your Favorite Skipper | Boating Safety Tips, Tricks & Thoughts from Captnmike