
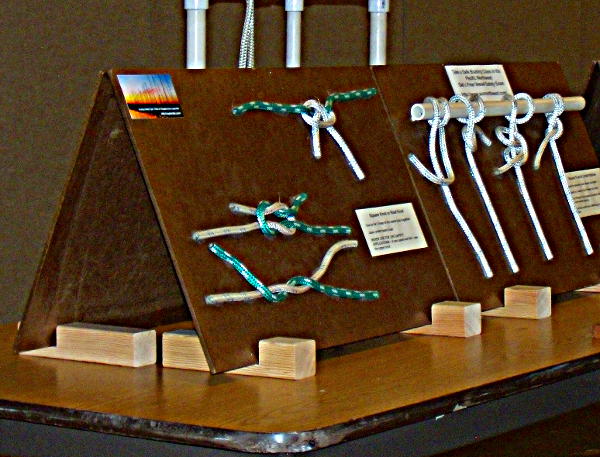
Knot boards being used in a boating class, showing the new feet holding up the knot boards.
These low-cost simple Do It Yourself feet make class aides like Knot Boards or other displays stand up for students in class or at public events.
A standup display is easier for students to use and for those passing by a booth at a public event to see and draw their attention to your booth.
Using these feet displays can be made of any 1/4 inch thick material that is the proper size. No need to buy special displays with built-in stands.
The 5/8 x 1 inch slot in the feet hold the 1/4 inch thick knot boards at about a 20 to 22 degree angle. This angle works well for both classroom use and public events.
The knot board feet material is nominal 2 inch by 2 inch clear stock (1.5 inch by 1.5 inch actual dimensions) cut 7 inches long. Best to have the lumberyard set a stop on the saw to make all the lengths the same. An 8 foot long piece of stock yields about 12 knot board feet.
The a 5/8 inch diameter router bit 1 inch long was used to cut the slot. The depth of the cut was the full length of the router bit (1 inch).
The slot is about 1 7/8 inch from one end and 4 5/8 inch from the opposite end. A guide was used for the router to get uniform results.
CAUTION: This is a large cut so the router needs to be held firmly to keep it from getting out of control. I made the cut from left to right, that has the pressure from the router bit forcing the router against the guide so the guide does most of the heavy work. But the individual feet need to be clamped firmly to prevent accidents.
My knot boards are all 20 inches wide by 13 1/2 inches high and made from 1/4 inch hardboard. The hardboard was sealed with clear satin Varathane Polyurethane this gives a nicer color than unfinished hardboard and helps keep the boards clean from handling. Sorry I can’t remember why I picked this exact size.
The feet also work well for 1/4 inch Foam Board. The feet are much easier to use than the funny cardboard angle pieces on the back of the Foam Board displays. Foam Board comes in many colors for eye catching displays to bring more traffic to your booth.
For those that are not instructors or teachers, please pass this on to your friends that are, this should make teaching easier.
More information on the Knot Boards.
A table saw could also be used to make the feet if you have one or have a friend with a table saw.
..
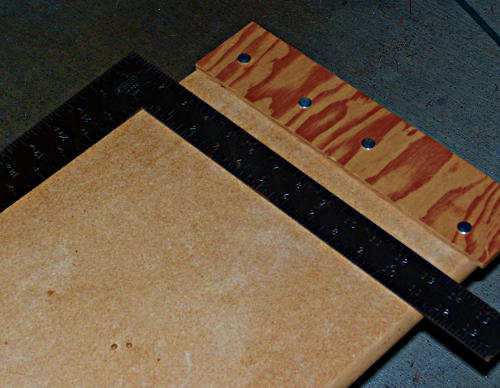 I made a fixture to make cutting the slot in the knot board feet easier. The fixture was made from a scrap piece of shelf material.
Set a stop at 90 degrees to the base board. Fasten the stop with a few drywall screws or whatever you have handy.
..

Knot Board feed clamped and ready for the router to cut the slots.
Blank feet clamped ready for the router.
The existing slots at each end are to prevent the wood from being torn out next to the slot when the cut is started or stopped. An example of the tear out can be seen on the left.
The angle aluminum is used as a router guide.
The clamp the feet firmly to each other to prevent them from moving (see a badly clamped example below).
The angle aluminum is 2 inches by 2 inches with the size of the router base I have the slot was cut 4 5/8 inch from one end and 1 7/8 from the opposite end, the dimensions are not exact but the long end needs to be long enough that the knot board don’t tip over backwards.
..
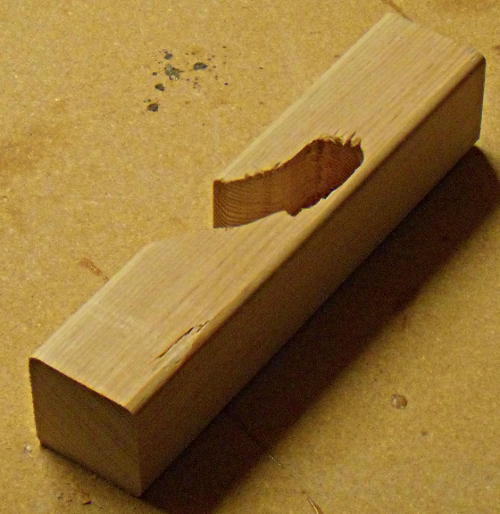
A bad cut when the foot was not clamped well and the router bit grabbed the slightly loose foot.
What can happen if the feet are not clamped firmly. The router bit can grab the feet and ruin the foot.
..

The new knot board foot is at the top – the bottom pictures are the old original knot board feet.
The new simpler knot board foot on the top.
The old knot board feet did not have enough space on the end and they tended to break as the lower foot shows.
The old knot board feet were also harder to make requiring a table saw and two cuts to make the slot wide enough for the knot board to fit into.
Thanks for your interest in and support of boating safety
– C / M –

